Looking to plan a trip to southwestern Utah but don’t know where to start? Use this guide to help you plan! Zion National Park and Bryce Canyon National Park are two of the most beautiful, and most unique, national parks I’ve ever seen. And what’s even better? They are very close to each other! This makes it easy to visit both parks in one short trip, could even be a long weekend trip.
Read through this guide to get helpful information on where to stay, how to enter and what hikes to do.
Where to Stay
This depends on what kind of trip you are wanting. If you’d like to rough it and truly enjoy nature, there are many campground options for both parks. If you’d rather have a nice bed and a warm shower, there are options for hotels and short term rentals.
Campgrounds
If you are going this route, I’d recommend spending one night at a campground in Bryce Canyon National Park and two nights at a campground in Zion National Park.
There are two main campgrounds in Bryce: the North Campground and the Sunset Campground. Both are in great spots to easily and quickly access the the park and the hikes. The North Campground requires reservations during peak season (mid-May to mid-October) and is first-come first-served the rest of the year. The Sunset Campground is only first-come-first-served. If you are planning your trip for weekend days during peak season, I would recommend locking down a reservation well in advance.
There are also two main campgrounds in Zion Canyon (which is closest to the South Entrance of the park): the Watchman Campground and the South Campground. Watchman Campground is slightly larger and provides some more amenities for RVs, and you can reserve a spot 6 months in advance. So this is the best option if you are planning a trip and want to make sure you have a spot in advance. The Watchman Campground is also open year-round. The South Campground also requires reservations, but these can only be made 14 days in advance, and it is closed for the winter season.
Both campgrounds are located very close to the entrance shuttle stop, so this makes it easy to get right into the park in the morning.
Hotels / Rentals
There are many options for hotels and/or short-term rentals like AirBnB and VRBO. You can find hotels right outside of both parks in the towns of Bryce and Springdale which will keep you close to the entrances. Another option would be to find a hotel or rental half way between the two parks. When I went, I rented an adorable place in the town of Alton, which is about half way. The towns of Hatch or Glendale would also be good places to stay that are about half way.
Day 1: Bryce Canyon National Park
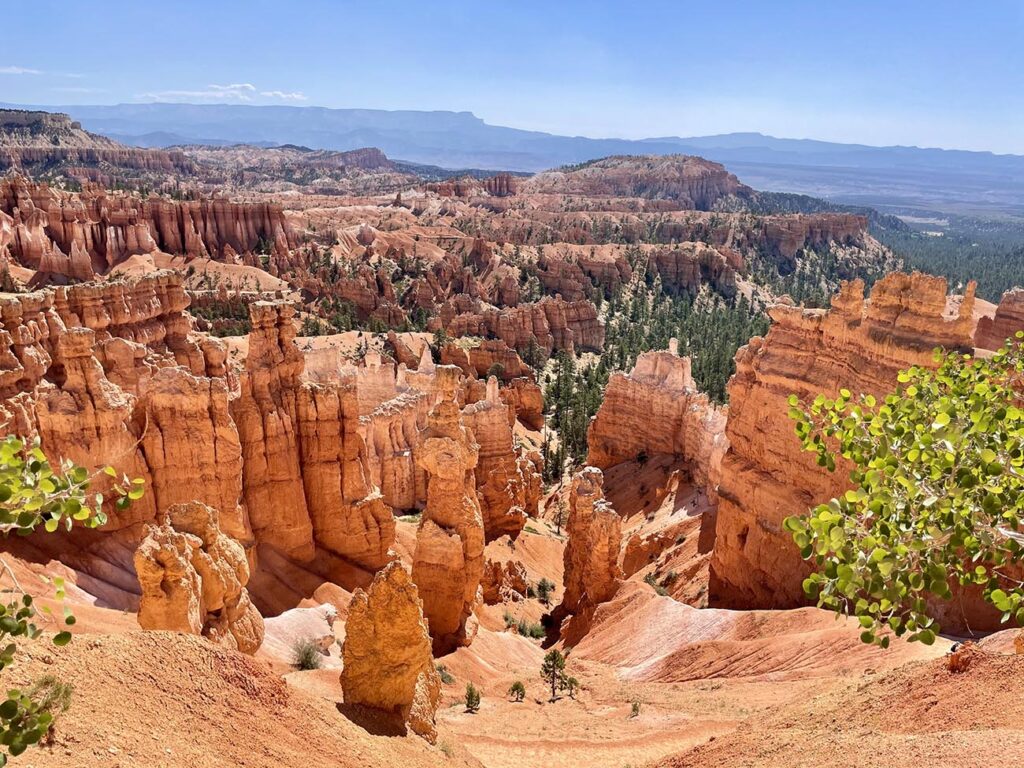
Bryce Canyon is definitely the smaller of the two parks, but that doesn’t mean it’s lacking in beauty. It’s famous for its bright orange/red colors and its hoodoos, tall rock spires that have formed by erosion.
There’s a main area of the park where many of the hikes are and you can choose your own adventure for how long you’d like to hike and how much of the canyon you’d like to see. Below are two options that allow you to see many of the famous views, one shorter and one a little longer.
Wall Street and Queens Garden Loop to Peekaboo Loop
6.3 Miles | Moderate | 1,499 ft. Elevation Gain | Hike Info
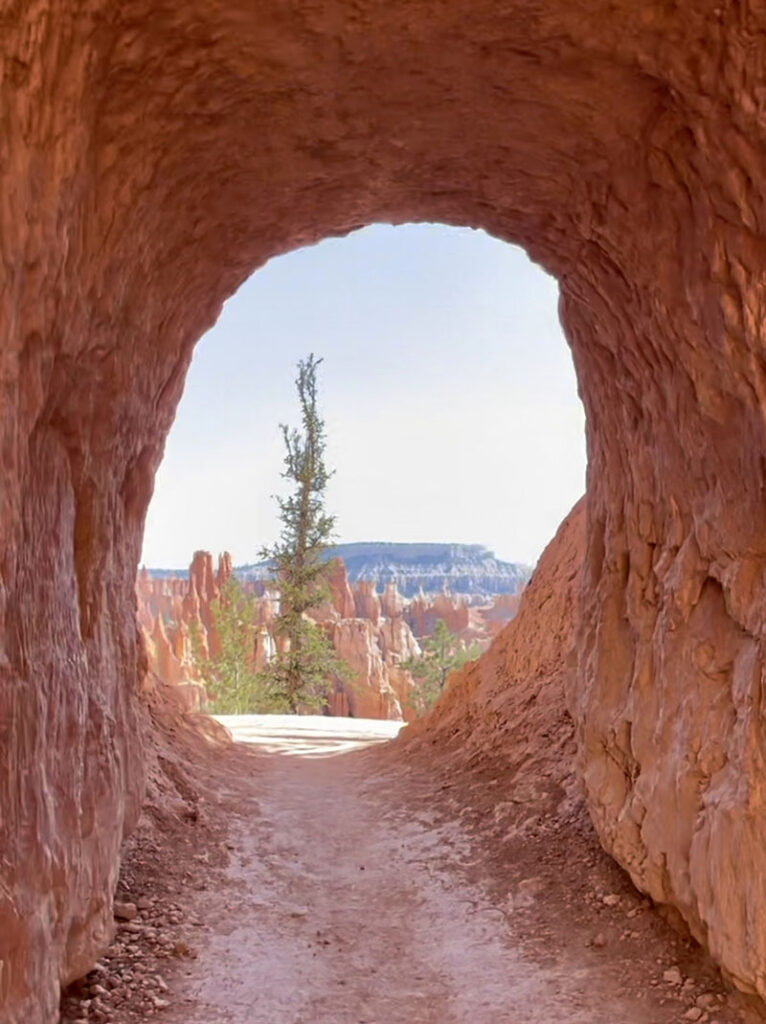
All hikes in Bryce start at the top wall of the canyon and go down into the canyon. This hike allows you to explore much of the canyon. You can hike this loop in either direction, but if it’s slightly easier if you start at Sunset Point and go down into the canyon on Wall Street. This part of the hike is basically walking straight up a walk (using switchbacks) so it’s hard if you choose to walk up this way instead of down. Either way, however, you are walking into a canyon, so at some point you are going to have to walk back up a wall to come out of it.
Once in the canyon, make sure to see the sites: Thor’s Hammer, Peekaboo Arch and Queen Victoria. You’ll also get some really cool views through tunnels and around corners of the whole canyon!
Navajo Loop and Queens Garden Trail
3.1 Miles | Moderate | 649 ft. Elevation Gain | Hike Info
This is a shorter version of the hike above. It follows a similar route into the canyon, but you won’t do the Peekaboo Loop. You can also choose to enter the canyon on Wall Street or a slightly less steep route. You’ll still get to see Thor’s Hammer and Queen Victoria on this loop.
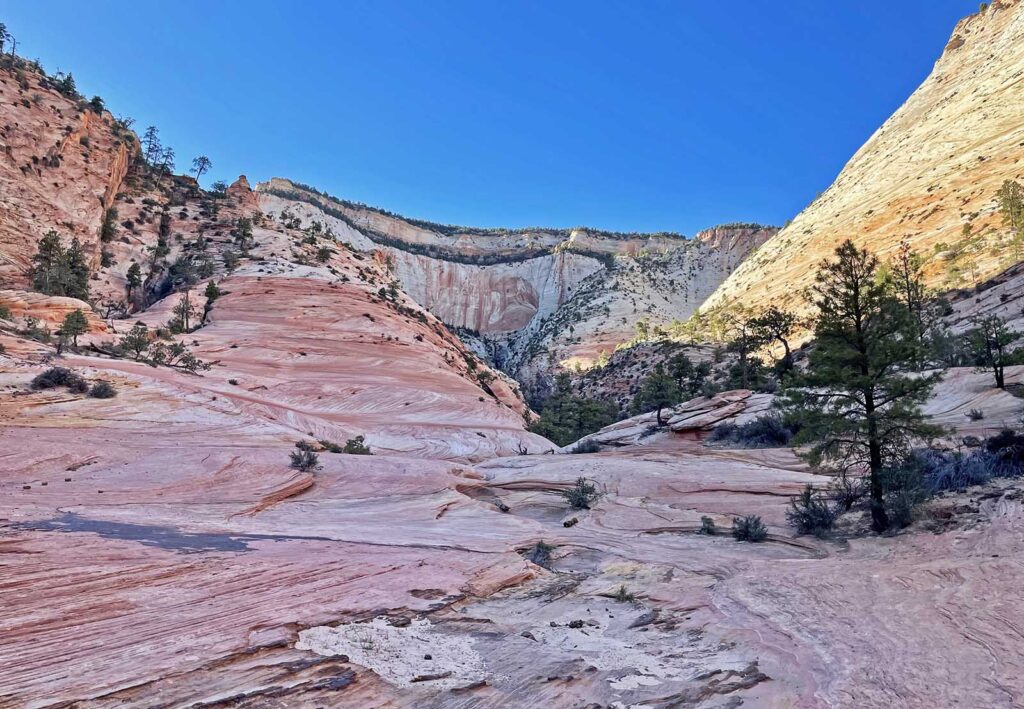
Day 2: Zion National Park
Zion can get very crowded during the peak season, so make sure to get an early start to the day if you would like to avoid some crowds. Also during peak season, the only way to get into Zion Canyon (where many of the main hikes are) is to ride the shuttle bus. You can board the shuttle at the Zion Canyon Visitor Center, and it usually runs from about 6 am – 6 pm. There can be lines that form to get on the first shuttle as well, so it is helpful to arrive at the Visitor Center before 6 am if you want to make it into the park early.
Once you get there early, take the shuttle to the Grotto stop and head to the Angels Landing Trail.
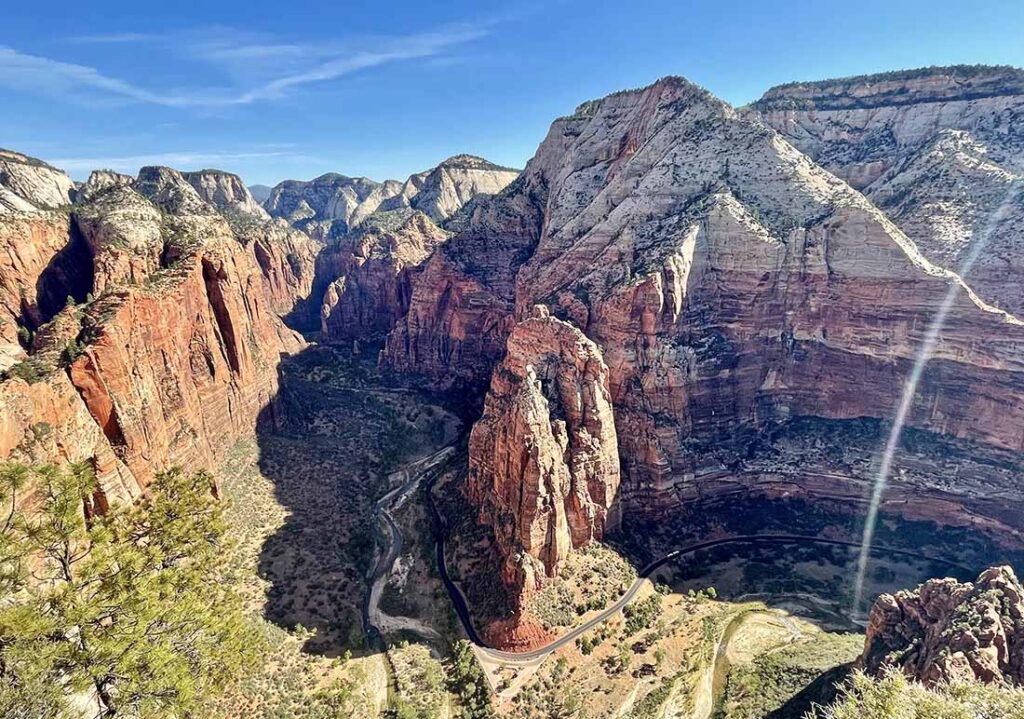
Angels Landing Trail
4.4 Miles | Hard |1,604 ft. Elevation Gain | Hike Info
Note: In 2022 a permit system was launched for the Angels Landing hike. So if you are planning on doing this hike, please make sure to enter either the Seasonal Lottery or the Day-Before Lottery to get a permit. You can find more information on this here.
This is one of the most famous and popular hikes in Zion (hence the new permit system). Given that, it’s so much better if you get there as early as you possibly can. For much of the hike the path is only enough room for one person to walk, and there is a chain fence that you must hold on to (as there are very steep drop-offs). The later in the day it gets, the harder it becomes to navigate the line of people in this section.
It is also not an easy hike. It’s pretty steep uphill in parts and as I said there is a chain system with drop-offs. You should definitely not do this hike if you are afraid of heights. If you are not afraid of heights and are in good shape, it is a very doable hike.
Once you make it to the top, you will be rewarded with amazing views! You are basically in the middle of the canyon and can see far into it from both directions. There is plenty of space at the top to hang out for a little, take some photos and bask in the beauty.
Observation Point via East Mesa Trail
7.0 Miles | Moderate | 702 ft. Elevation Gain | Hike Info
If you aren’t able to get a permit for Angels Landing (or just don’t feel comfortable attempting it) the Observation Point trail is a good alternative! It provides a similar view into the canyon, just higher up! You can actually look down and see Angels Landing from Observation Point.
The trailhead for this one is not in the canyon so you won’t have to take the shuttle to it. You will have to drive a little bit to reach it.
Petroglyph Pools to Slot Canyon
1.2 Miles | 187 ft. Elevation Gain | Easy to Moderate | Hike Info
If you still have some energy left after the first hike of the day, try this short hike! It goes through some very cool terrain and tends to be much less crowded than the rest of the park. It’s also not in Zion Canyon so you won’t need the shuttle to get to this one. The petroglyphs are pretty early on in the hike and you have to walk to a wall to find them.
The path can be a little tough to keep track of at times since a lot of it is on rock, so make sure to download the map offline if you can!
Day 3: Zion National Park
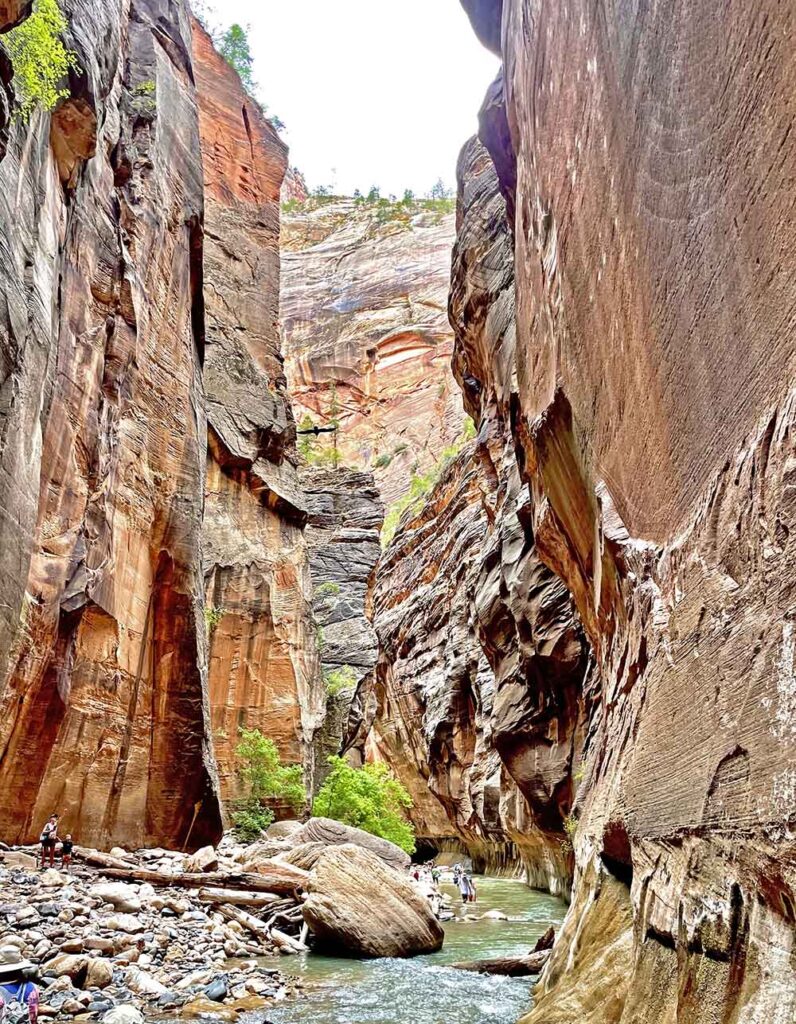
The Narrows – Bottom Up
8.9 Miles (or less) | Hard | 695 ft. Elevation Gain | Hike Info
Here’s another one of the most famous and popular hikes in Zion – the Narrows. This hike is very unique as it is actually walking in the river through the canyon and allows you to see some amazing views of the canyon. The nice thing about this trail is that you won’t need a permit to hike it and a lot of it is quite wide. So even if there are a lot of people, you won’t be walking in a single file line.
The full hike is almost 9 miles, but you don’t have to do it all if you don’t want to. You can go as far into the canyon as you want! And don’t let the small elevation gain fool you, this is a hard hike. The fact that you are walking through sometimes knee-deep water and walking on slippery rocks make it very tough.
There are a few gear things you’ll likely want to get before you hike this: a walking stick and waterproof socks and/or shoes.
I cannot emphasize the walking stick enough. It is so important to have one to keep your balance. This can be in the form of a regular trekking pole that you may already have or one of the walking sticks they rent out in Springdale, Utah (town right outside of Zion) or just a long stick that you find in the woods! I used one that I found in the woods and it worked perfectly.
As for waterproof socks and/or shoes – I bought some waterproof socks on Amazon and wore my normal hiking boots and it worked just fine for me. Yes my feet were soaked, but I find it hard to believe any footwear can really keep this from happening when you are knee-deep in the river and the water can get into your shoes from the top. I also brought a change of shoes for after the hike so I didn’t have to stay in my wet socks and shoes. Another option is to rent waterproof boots from one of the stores in Springdale. I saw many people walking in these and they seem like they worked well too.